Whimsey Jars-A Collage

Whimsey Jars-A Collage

Sunday, November 14, 2010

Christmas Luminaries!


History of Luminarias

Holiday luminaries, or luminarias, are sand-filled paper bags with a votive candle or battery-operated tea light set inside. Luminarias line the streets and rooftops in the Southwest United States and throughout Mexico and Latin America during the nine days before Christmas, often through January 6, the Feast of the Three Kings. The lights show the way to the Inn for Mary and Joseph during Las Posadas. Holiday luminarias are also called farolitos, which means little lanterns.

According to the Albuquerque, New Mexico Convention and Visitors' Bureau, "Luminarias have not always been made out of paper bags, the early versions were actually small bonfires of crisscrossed piƱon branches which were built in 3-foot-high squares." The bonfires were lit to guide people to Midnight Mass on Christmas Eve. Las Posadas is a nine-day celebration of the journey of Mary and Joseph to Bethlehem, and their difficulty finding lodging when they arrived. Children carry farolitos from house to house, accompanying "Mary" and "Joseph." They knock on doors, sing a song begging for food and shelter, and are turned away. At the last house of the evening, which is designated as La Posada, or the resting place, the children (and adults) are invited inside and served holiday tamales, biscochitos, posole and chili stews.

 Materials

Holiday luminaries, or farolitos, can be made from small paper bags. Use white bakery bags for the most dramatic effect. The paper allows the glow of the candle inside to show. Colored bags are available in grocery stores, close to the plain brown paper lunch bags in the household products aisle. Fold the top two or three inches of the bag down. If desired, cut a Christmas tree, star, holly leaf or other Christmas shape into the side of the bag. This creates an interesting effect as the candle flickers inside. Fill the bag halfway with sand, then push the candle down into the sand about an inch. The sand keeps the bag from being blown over, and prevents the melting candle wax from accidentally setting the bag on fire.

Influences

The festival of Las Posadas originated when Catholic missionaries introduced the story of Mary and Joseph and the birth of Jesus to the native people of Mexico and and Latin America. Because wood is often scarce in the Southwest, the practice of lighting signal bonfires was not sustainable. When Chinese immigrants brought their beautiful paper lanterns with them, locals began using them instead of lighting bonfires. The lanterns were expensive and the paper to make them was scarce, so people began using plain paper bags instead.

Significance

Cities such as Albuquerque, New Mexico have become famous for their holiday luminary displays. Neighborhoods and charities all over the country use the sale of holiday luminaria supplies as a fundraiser, often netting several thousand dollars a season. Displays of holiday luminarias several million dollars from tourism to many Southwest towns. This money is a vital resource for these communities.

Cleanup and Recycling

Unlike jack-o-lanterns at Halloween, there is little cleanup with luminarias. Remove the spent candle, which can sometimes be remelted and molded again. Pour the sand into a covered container with a tight lid to keep cats and other animals from fouling it between seasons. Fold the paper bags and store them if they are in good shape. If they are tattered or scorched they can be shredded and added to your home compost pile.
.

The Pickled Pepper-Primitive Luminaries


Accentuate "N" Ink-Christmas Glass Block Luminaries


Articlesbase-Tin Can Luminary


Oodlekadoodle Primitives-Tin Can Luminarias


Stamping:The Fun Times Guide-Paper Bag Luminaries


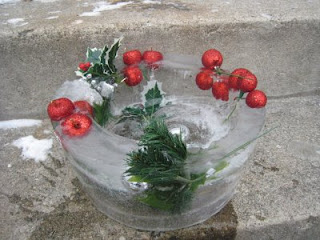
eHomebody.com-Ice Luminaries


How To Make Luminaries from Mason Jars


Christmas luminaries, used to light the way to holiday gatherings, are a popular tradition in the South. Traditionally constructed from a paper bag with a candle inside, luminaries pose the risk of fire if they're not watched carefully and are nearly impossible to use in areas with extreme weather conditions. These Mason jar luminaries reduce the risk of fire and are waterproof.


Difficulty: Easy
Instructions.Things You'll Need:

Mason jars
Votive candles
Sand
Tinsel
Hologram glass paint
Crushed glass

 1. Choose pint or quart-size Mason jars that are the same size and style. For the best results, all jars should be the same type of jar.

2. Paint designs on the outside of the Mason jars with hologram glass paint to add sparkle. Trace the outline of a star and fill in completely or dot with the glass paint. Dot fine lines around the jars to make or complete a design.

3. Fill the bottom third of the jars with crushed or cut glass. Create a colorful display by using colored glass to reflect the light, or stick to clear crystals to reflect natural light.

4. Wrap decorative ribbon around the mouths of the Mason jars and tie them into bows. Add luminescent balls or sprigs of evergreens by hot-gluing them in place.

5. Insert the votive candles into glass candle holders. Secure the holders in the luminaries by pushing the base of the holders into the crushed glass.

6. Arrange luminaries along the walkway to light the pathway to your home. Light candles before holiday gatherings to light the way for guests.


Tuesday, October 12, 2010

Christmas Tassel Pics and Tutorial

christmas tassels Pictures, Images and Photos


christmas tassels Pictures, Images and Photos


 Tassel Tutorials


Wednesday, October 6, 2010

Make Baskets From Old Newspapers!


Christmas is just around the corner. Homemade gifts are very popular ideas these days and I think I have found an idea you will enjoy now AND for YEARS to come. For packaging a gift, for displaying a collection, or even just for managing clutter, baskets are wonderful!

Even in the beginning, man's eyes were bigger than his common sense. And ever since, we have been finding, accumulating, and storing all sorts of THINGS!

Make baskets out of old newspaper pages. You don't have to be incredibly creative, though a little bit helps. Your children can always pick up your slack in that department. These really can turn out nice! Plan for an hour or so at the kitchen table and you're in business!

First, collect your old newspapers. Sort them into types. My 3 piles were of comics, grocery circulars, and newsprint (by subject - headlines, finance section, etc. can be fun, too). Buy several grade school glue sticks and some medium weight florist's wire and you're ready to go! The florist's wire is not absolutely needed, it just helps a bit when you are manipulating the reeds later.

 STEP 1: Make a "reed" out of a 13 1/2- by 22-inch sheet of newspaper. Starting with a long edge, tightly roll the sheet (around an equal length of florist's wire) into a tube. Flatten the tube and use a glue stick to secure the open edge. Assemble seven more reeds.

STEP 2: Lay four of the reeds side by side on a flat surface and weave in the remaining four. Slide the strips together to make the bottom of the basket. Fold the ends of the reeds up to form the side spokes (this is where the wire helps).

STEP 3: Now, cut newspaper sheets into four 11- by 27-inch rectangles. Using the same method as before (preferably with the wire), roll four more reeds. Tape the end of a reed to the base of a spoke. Weave the reed in and out of the spokes, around the basket.

STEP 4: Tuck the end behind a spoke. Weave in the other reeds, one above the other. Fold the tops of the spokes into the basket and tuck them behind a reed.

STEP 5: Use craft paints, lacquer or spray paints to coat the finished basket inside and out, then add decorative items or painted designs.

Once you've made a couple, the sky is the limit on variation!


MAKE A HANDLE

To make a handle, EXTEND one of the reeds on either side of the basket and then when you pull them together ober the top bind them with an extra reed to make a "thicker" spot/handle.

REINFORCE THEM

Dip them into liquid starch after they're formed, so they dry stiff or lacquer them after they're painted.

TRY AGAIN FOR DIFFERENT SIZES AND SHAPES

You could even make teeny tiny ones for Christmas ornaments, or smaller gift baskets

DECORATE THEM

Dip autumn leaves in floor wax and then hang to dry (retain color and shape that way). The baskets could be decorated with autumn leaves.

UTILIZE DIFFERENT PARTS OF THE NEWSPAPER FOR DIFFERENT BASKETS!


Use the COMICS SECTION for childrens baskets - even alternate comics with newsprint. You could make them out of GROCERY CIRCULARS also for "kitchen-type" gift baskets! Make a billbox for Dad out of the FINANCE SECTION. Just fold your reeds to allow the print to "show" On this latter idea, line the basket with play money.


 Make a bubble bath basket by filling your woven creation with a votive candle, a soft washcloth, a bar of herbal soap and a cannister of homemade bath salts. Wrap the whole thing in mesh bag that mom can use to collect bath toys before jumping into the tub.

Make a Snow Man Kit in a basket. Collect charcoal for eyes and a fabric remnant for a scarf. Add a squirt bottle of colored water to "snow paint" with and a extra set of mittens. Add a couple of packets of hot chocolate mix (with marshmallows) and you have it covered!

You get the idea! Happy Basket Making!


Thanks to essortment.com for the instructions!
Photos-google.com


Friday, September 24, 2010

How To Gather Seeds From Rose Hips!

Gathering rose hips for seed and rose plant propagation is typically performed in the fall of the year. Choose those hips that are fully ripe and plump. Ripe rose hips will generally be a deep red or orange in color and have no shriveling to the outside covering. It is best to keep an eye on the roses as they grow throughout the year and identify the most prolific plants and flowers. These plants will have a better chance of seed germination and the characteristics of the rose will be passed on through the seeds.


Instructions

Things You'll Need:

Bird netting (optional)

Small sharp knife

 Sealed jar

One teaspoon of bleach

Water

Tray

Refrigerator

1. Collect the rose hips from the selected plants, preferably after the first frost. You may wish to cover the rose plants with some type of bird netting to keep the birds from eating the selected hips. Rose hips are a natural food for most winter type birds.

2. Cut the hips open with a small sharp knife. The seeds are very hard and will not be damaged by the knife's blade. Work the seeds out of the pods with your fingernail.

3. Place the seeds into a glass jar. Fill the jar approximately half full with water. Add one teaspoon of bleach to the water.

4. Close the jar with a screw type lid. Shake the container well to mix up the seeds and the bleach water solution. Allow the seeds to settle to the bottom of the jar for about ½ hour.

5. Pour off the floating seeds. Keep the seeds that have sunk to the bottom. The sinker seeds will have the best chance at germination. Remove the seeds from the jar and place on the metal tray to dry.

6.Place the dried seeds in the sealed jar and set in the refrigerator for storage and stratification. The seeds will have to remain in the refrigerator for 45 days to 60 days to be fully stratified before planting. Stratification is the process of treating the seeds with cold temperatures before they will germinate.

Tip: Cease deadheading the rose plant prior to the month of September. This will increase the chances of the rose plant in producing hips for replanting.

Drying Rose Hips!

Rose hips are the cherry-sized red fruits of the rose bush left behind after the bloom has died. Although nearly all rose bushes produce rose hips, the tastiest for eating purposes come from the Rosa rugosa variety. The flavor is described as fruity and spicy, much like the cranberry. Harvest the fruits after the first frost when they become fully-colored, but not overripe. They should yield to gentle pressure but not be soft or wrinkly. Most recipes advise removing the irritating hairy seeds before processing the fruit. When cooking with rose hips, do not use any metal pans or utensils other than stainless steel or risk discoloration of the fruit and loss of its precious vitamin C stores.

If the petals have fallen from your roses, leaving behind small, red hips that look like tiny apples, don't let the hips go to waste. Rose hips aren't difficult to preserve by drying and they are full of vitamin C. The dried hips can be used to make sweet, tangy tea, jam, jelly, syrup and wine. Although not all newer rose bushes have hips, old-fashioned rosa rugosa roses and wild roses will have hips in abundance.


Just after a frost is the best time to gather rose hips. Snap off the tails as you pick,or later when you reach home. Spread the hips out on a clean surface and allow to dry partially. When the skins begin to feel dried and shriveled, split the hips and take out the large seeds -- all of them. If you let the hips dry too much, it will be difficult to remove the seeds. If not dry enough, the inside pulp will be sticky and cling to the seeds. After the seeds are removed, allow the hips to dry completely before storing or they will not keep well. Store in small, sealed plastic bags. These will keep indefinitely in the freezer or for several months in the refrigerator. They are packed with vitamin C and are good to munch on anytime you need extra energy...or a moderately sweet nutlike "candy."

Tuesday, August 31, 2010

As Soon As Fred Gets Out of Bed


As Soon as Fred Gets Out of Bed by Jack Prelutsky


As soon as Fred gets out of bed,
his underwear goes on his head.
His mother laughs, "Don't put it there,
a head's no place for underwear!"
But near his ears, above his brains,
is where Fred's underwear remains.

At night when Fred goes back to bed,
he deftly plucks it off his head.
His mother switches off the light
and softly croons, "Good night! Good night!"
And then, for reasons no one knows,
Fred's underwear goes on his toes.


Sunday, August 29, 2010

Glass Containers for Whimsey Jars! In My Opinion...

Glass Containers for Whimsey Jars:
A Short List


You Are Only limited By your Imagination!


Empty Jars and Glass Containers


Empty glass containers such as jam jars, pasta sauce bottles, and even soda bottles can be reused before they are recycled. Use them to make flower vases, store jams, pickles and sauces, or even grow sprouts.

1.Before you can use these bottles, you should first clean them thoroughly using dishwashing detergent. Once they have been cleaned, leave them by the window sill to dry. Sometimes, glass jars have sticker labels on them which can be quite tricky to remove. The tip to completely removing sticker labels in one go is to spread a thin layer of peanut butter onto the sticker first, before washing the bottle. Leave it overnight to dry. You will find it easier to peel the label off the next day. Besides that, most glass jars also have a thin Styrofoam piece underneath the lid that helps to keep the bottle air tight. You should remove this piece of Styrofoam as there might be dirt accumulated under it.

2.You can now use these bottles to store homemade jam, homemade pickles, homemade vanilla syrup, or leftover sauces. Before storing food items, you should also remember to sterilize the jar as you would with baby bottles; that is by boiling them with their lids off in hot water (Do not boil glass jars with their lids on as this might cause them to crack or even explode, if the walls are thin). This will get rid of all the bacteria that might contaminate your food and make them go bad. You should sterilize the bottle just before you use them to minimize contamination. Once you have filled the jars, leave them to cool before you put the lid on to avoid water from forming under the lids due to condensation.

3.Alternatively, you can also use these empty jars to grow alfalfa sprouts, or even kitchen herbs which you can put by the window sill. Again, if you intend to use the glass containers to grow alfalfa sprouts, remember to sterilize them and cool them first before you put in the seeds. This is because the bacteria may feed on the sprouts and even cause contamination.

4.Besides that, you can also turn clear glass bottles into flower vases. All you need is to paint decorateit by painting the outside surface. However, to do so, you will need acrylic paint as poster paint and watercolour paint will not stick well onto the glass surface. In order to make the acrylic paint stick onto the glass surface even better, mix in a little bit of dishwashing detergent into the paint before you start painting the bottle.


Read more: http://www.diy-guides.com/reusing-empty-jars-and-glass-bottles/#ixzz0y2ZAkvao